英语
英语 西班牙语
西班牙语 中文简体
中文简体How to polish 3D printed parts for a soft finish like mirror?
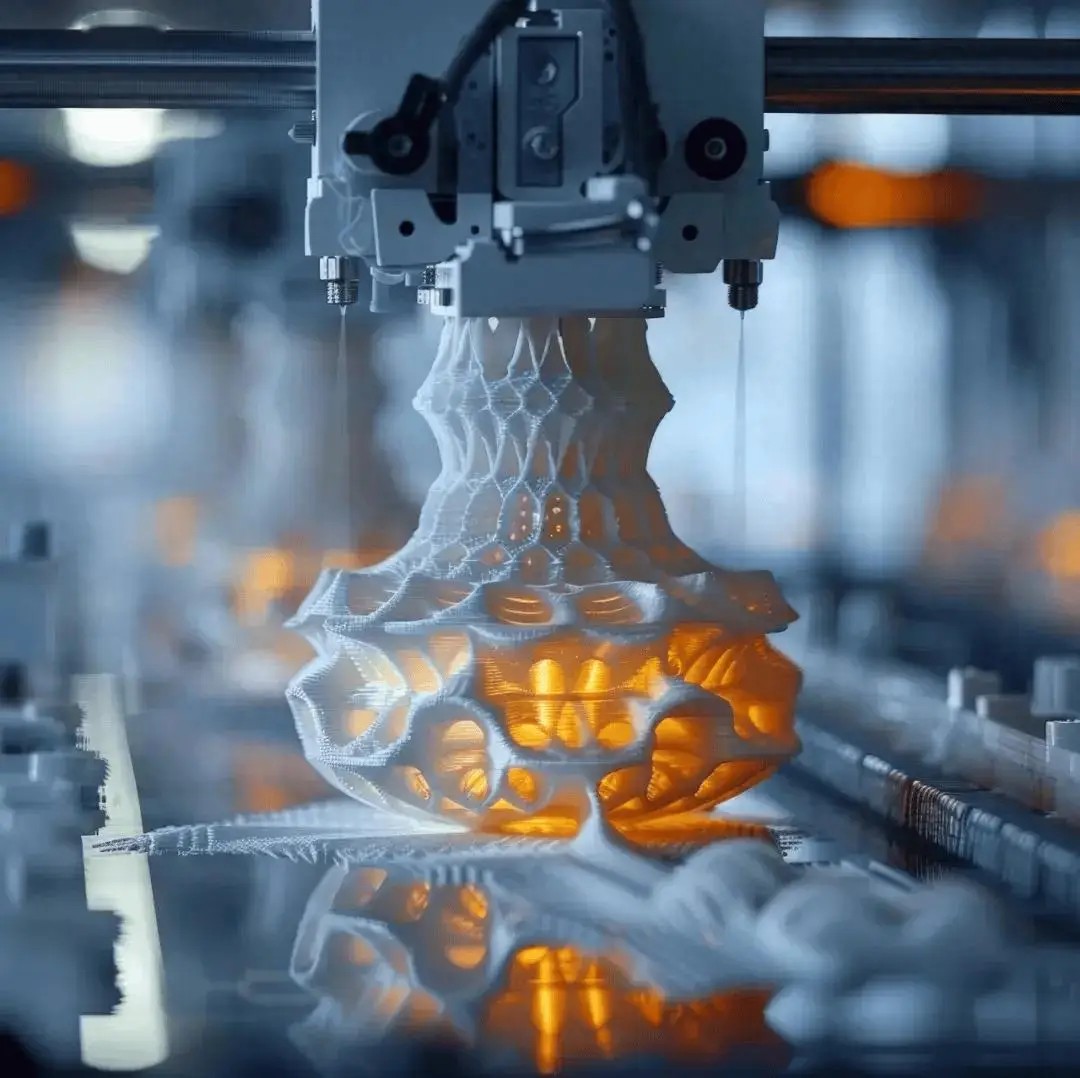
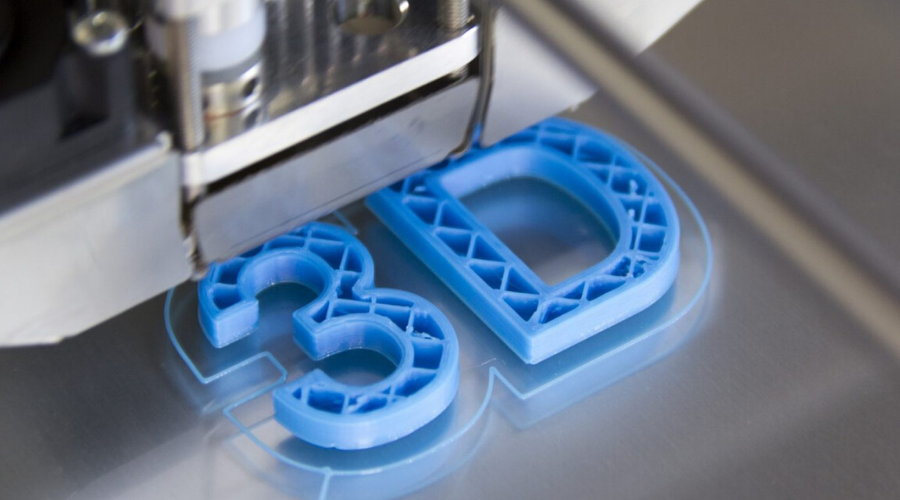
In the current manufacturing panorama, the 3D impression stands out for its flexibility and customization capacity. It allows designers and engineers quickly transforming concepts into physical models, with automotive, medicine and aerospace applications. However, 3D printed parts usually have rough surfaces, with visible layer lines or defects that do not meet professional standards. This is where postprocessing is essential. Through specific surface treatment techniques, the aesthetics, mechanical performance and the functionality of the pieces can be significantly improved. This article explores several postprocessing techniques to achieve soft surfaces, offering practical advice for beginners and professionals.
Why do 3D printed parts need postprocessing?
3D printing is based on layer manufacturing, either by FDM (molten deposition modeling), SLA (stereolithography) or SLS (selective laser sintering). This process leaves cape lines or granular textures. According to industry data, unreasonable pieces have a superficial roughness (RA value) of 10-50 microns, while postprocessing can reduce it to less than 1 micra, achieving almost mirror finishes.
The postprocessing has multiple objectives: eliminate layer lines, soften surfaces, improve corrosion resistance, refine dimensional precision and prepare parts for paint or assembly. The choice of the method depends on the material (plastic, metal or resin), the complexity of the piece and the budget. Next, we detail the most effective techniques.
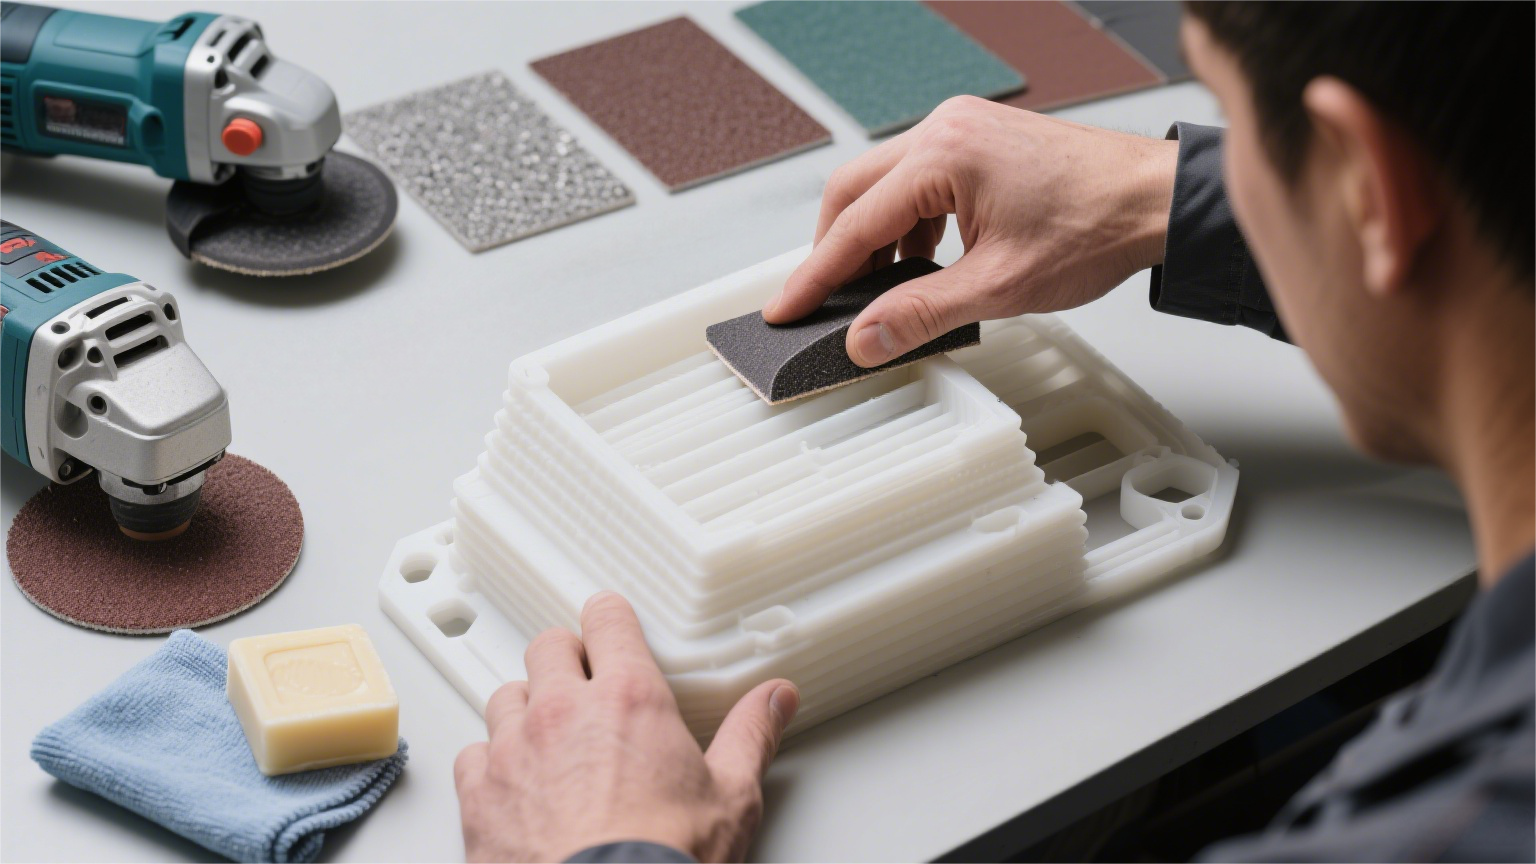
- Manual or mechanical sanding: a simple but effective method
Sanding is the most accessible and economical postprocessing technique, ideal for plastic and resin pieces. Physically imperfections to obtain a uniform and soft finish.
Start with the right tools: Thick grain sandpaper (80-120) to eliminate layer lines, going to fine grains (400-2000) to polish. Manual sanding is ideal for small parts, while electric sanders or vibratory machines speed up batch processing.
Steps:
Clean the piece: Use alcohol or a soft cleaner to remove waste.
Thick sanding: sanding gently following the layer lines to avoid deformations.
Intermediate sanding: Use wet sanding with water to reduce dust and improve softness.
Final polishing: Apply polishing compound with a cloth for a bright finish.
Key advice: controls the dimensions during sanding. For pieces with strict tolerances (eg, ± 0.1 mm), leaves a margin of 0.2-0.5 mm to avoid sanding in excess, which can weaken or deform thin wall pieces. Sanding is laborious but versatile, ideal for DIY fans.
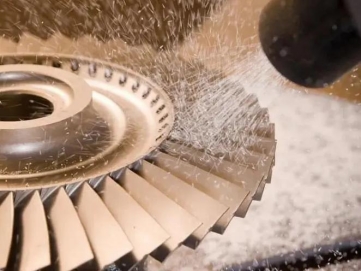
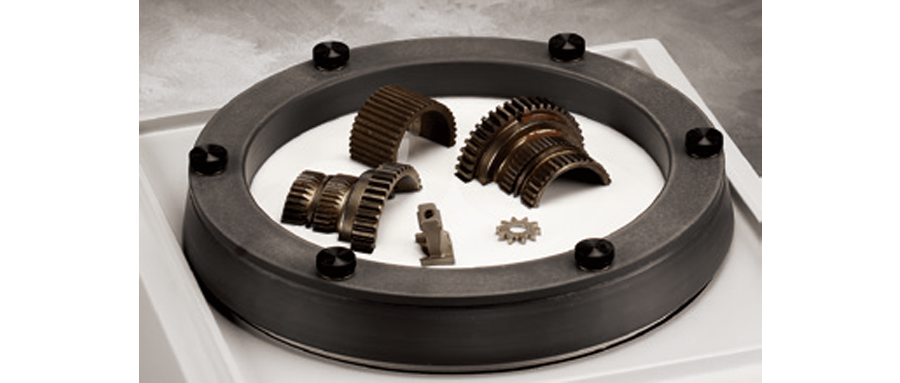
- Sand and granallado jet: Professional optimization for metal pieces
For 3D -printed metal parts, such as aluminum, titanium or stainless steel, sand jet and granallado are highly effective. These techniques use high -speed particles to refine surfaces.
The sand jet uses abrasive media (eg, aluminum oxide or glass pearls) to eliminate oxide and soften textures, ideal for aesthetic improvements and coating preparation. Manages complex geometries without damaging internal structures. The granallado, meanwhile, uses metal balls to induce compression voltage, improving the useful life and resistance to cracks, common in aerospace components.
Equipment: A sand or granallado jet cabin is needed, with protection equipment to avoid dust inhalation. Control parameters such as pressure (50-100 psi) and particle size (100-300 meshes) to avoid superficial damage.
Compared to sanding, these methods are faster (minutes per piece) and automated, but require greater initial investment. For example, an automotive supplier reduced the roughness of RA 20 microns at ran 5 micro with a lease jet, improving product competitiveness.
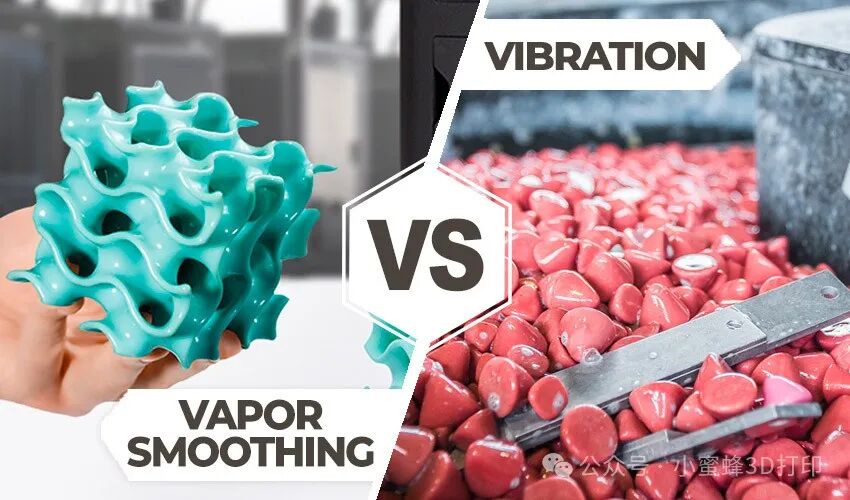
- Vibratory and drum polishing: ideal for batch processing
To process multiple pieces simultaneously, vibratory polishing and drum are excellent options. These techniques use mechanical movement and abrasive media (eg, ceramic pearls or plastic pellets) to generate friction and achieve uniform finishes.
The vibratory polishing places the pieces in a vibratory container with media and lubricant, using high frequency vibrations (thousands per minute) to eliminate burrs. Drum polishing, suitable for larger pieces, is performed on a rotating drum. Both may include chemical additives to accelerate the process, with time treatment times.
Advantages: Efficient for batch production and complex forms, with uniform brightness. The disadvantage is the least effectiveness in intricate internal channels. Wash the pieces after polishing to remove waste.
In the manufacture of medical devices, these techniques are used in 3D printed implants to guarantee sterile and soft surfaces that reduce infection risks.
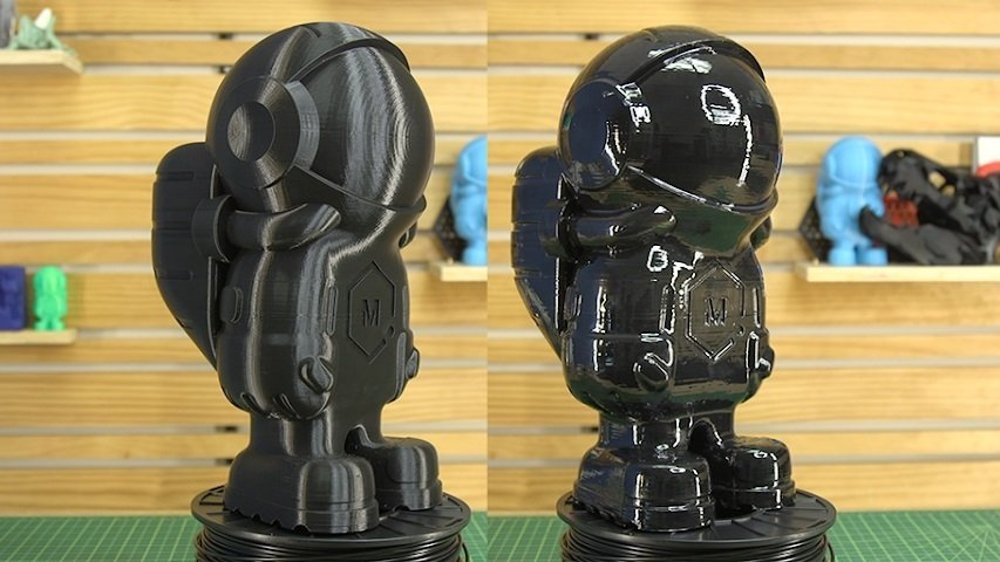
- Steaming by steam and submersion in solvent: chemical routes for a bright finish
Steam softwide is an ideal contact without thermoplastic contact such as ABS or ASA. It exposes the solvent vapor pieces (eg, acetone), causing the surface to be slightly and flow, creating a bright finish.
Process: Heat the solvent in a sealed camera, suspending the piece for minutes. An alternative is the submersion in solvent, but time must be controlled to avoid excessive dissolution.
This method is fast (5-30 minutes) and produces mirror surfaces, but it is not suitable for all materials (eg, PLA can deform). Security note: operates in a well ventilated area to avoid exposure to vapors.
Compared to physical methods, steam softwad is more uniform, but can slightly alter the dimensions, ideal for applications not precise as prototypes or decorations.
- Epoxy resin coating: sealed and strengthening
The epoxy resin, a reactive polymer, is applied as a coating or infiltrator in 3D printed parts. Fill microporos, creating hermetic and impermeable surfaces, in addition to improving heat and chemical resistance.
Application: brush, spray or infiltrate resin. After the cure, the surface is soft and lasting, ideal for functional parts such as pipes or housings.
Tip: Sand the piece before applying epoxy for better results. Use low viscosity resin for uniform coverage and respect cure times (normally 24 hours).
- Hybrid manufacturing: combining additive and subtractive techniques
Modern manufacturing adopts hybrid approaches, integrating 3D (additive) impression with CNC machining (subtractive). Milling or turned after impression eliminates precision rough layers, achieving high quality surfaces.
Hybrid machines, which combine laser and CNC fusion, can reduce production cycles by more than 30%, ideal for high -end applications.
Conclusion: Elevate your 3D impressions with the appropriate postprocessing
With these techniques, you can transform printed pieces into rough 3D into professional quality products. The key is to choose the method according to the material, use and budget, prioritizing security and precision. Start with small -scale tests to perfect the process. If your company offers 3D printing services, mastering these techniques can differentiate.